
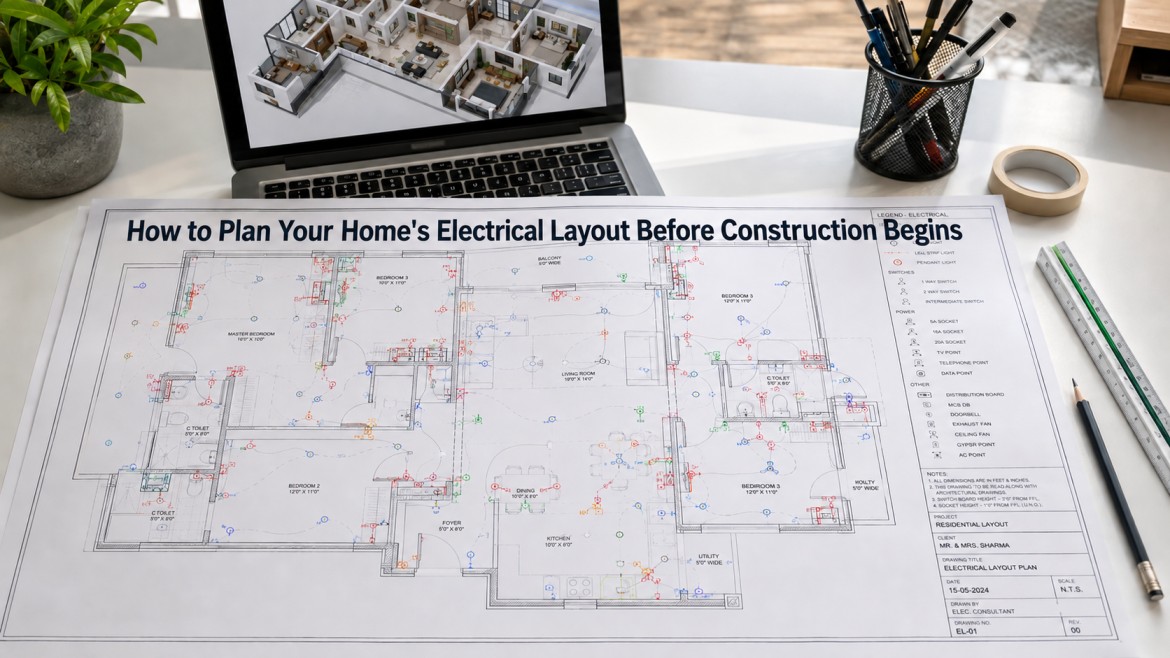
Building a new home is an exciting journey — but it comes with dozens of decisions that need careful thought. One of the most important, yet often overlooked, steps is planning your home’s electrical layout before construction begins. Many homeowners in India focus on floor plans, materials, and interiors, and leave electrical planning as an afterthought. That can be a costly mistake.
At Maksideo Design Consultants, we have seen firsthand how a well-planned electrical layout for a new house in India transforms the way a home functions. When electrical planning happens early — in sync with the architectural design — you avoid expensive rework, ensure safety compliance, and future-proof your home for years to come.
So, where do you begin? This guide walks you through everything you need to know about planning your home’s electrical layout before construction starts.
Outline
- Why Electrical Planning Must Happen Before Construction
- Common Electrical Planning Mistakes to Avoid
- Final Thoughts
Why Electrical Planning Must Happen Before Construction
Most people think electrical work can happen after the walls go up. However, the wiring in your home runs through the walls, floors, and ceilings. Once the structure is complete, making changes becomes expensive and disruptive.
Here is why early electrical planning matters:
- You avoid chipping walls and redoing plaster to add new circuits.
- Your structural engineer and architect can coordinate conduit routing into the slab and walls from day one.
- You ensure compliance with the National Electrical Code (NEC) and Bureau of Indian Standards (BIS) guidelines.
- You plan for future needs — EV charging points, smart home systems, and solar panels — without additional cost later.
In short, electrical planning is not just about where the switches go. It is about designing how power flows through your home efficiently, safely, and smartly.

Step 1: Start With a Detailed Floor Plan
Your electrical layout begins with your architectural floor plan. Before you finalize any electrical decisions, make sure your floor plan is complete and accounts for every room, passage, balcony, utility area, and wet zone.
Here is what your floor plan helps you determine:
- Room-by-room lighting requirements based on room size and function
- Placement of doors and windows, which affects switch and socket locations
- Wet areas such as kitchens, bathrooms, and utility rooms that need special circuit safety (RCCB/ELCB protection)
- Traffic flow through the home, which guides the placement of two-way switches and sensor lights
Once your floor plan is ready, your interior designer and electrical consultant can mark the initial zones for lighting, power, and special circuits.
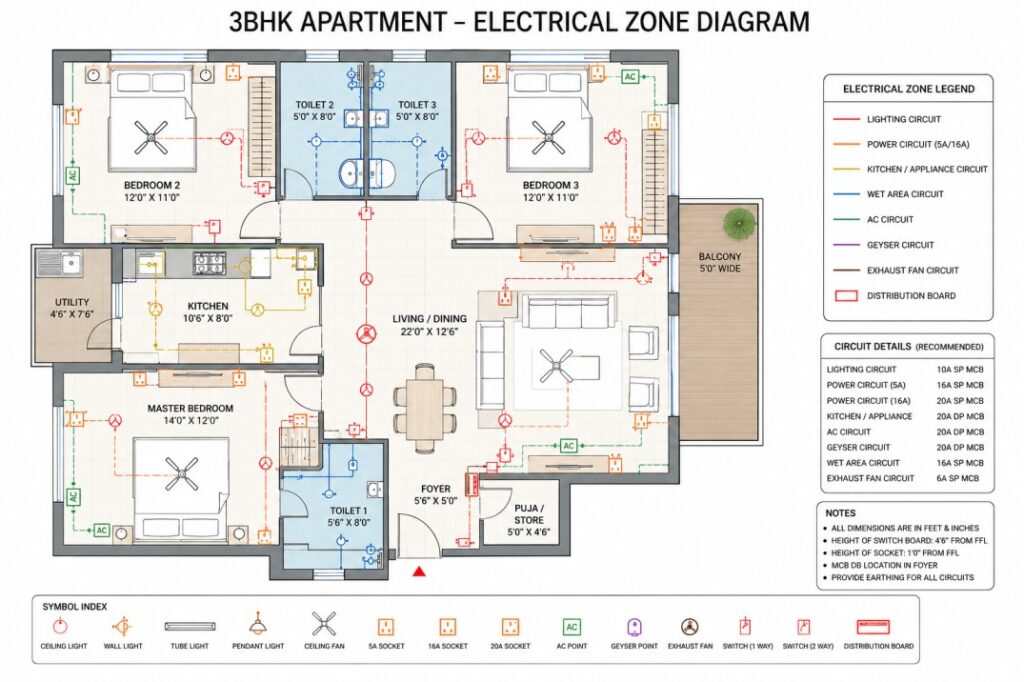
Step 2: Identify Your Electrical Zones
A good electrical layout for a new house in India divides the home into clearly defined zones. Each zone has its own circuit so that a fault in one area does not affect the rest of the house.
Common Electrical Zones in an Indian Home
- Lighting circuit — Controls all ceiling lights, wall lights, and accent lighting
- Power sockets circuit — Handles general-purpose plug points across rooms
- Kitchen circuit — Dedicated high-load circuit for refrigerator, microwave, mixer, and chimney
- Air conditioning circuit — Each AC unit typically needs its own dedicated circuit
- Geyser circuit — High-load appliance requiring a dedicated line with proper earthing
- CCTV and networking circuit — Low-voltage circuit for internet routers, CCTV, and doorbells
- EV charging circuit — Future-ready provision for electric vehicle charger in your parking area
By separating these zones at the planning stage, you give your electrician clear instructions and ensure the load is balanced across multiple circuits.
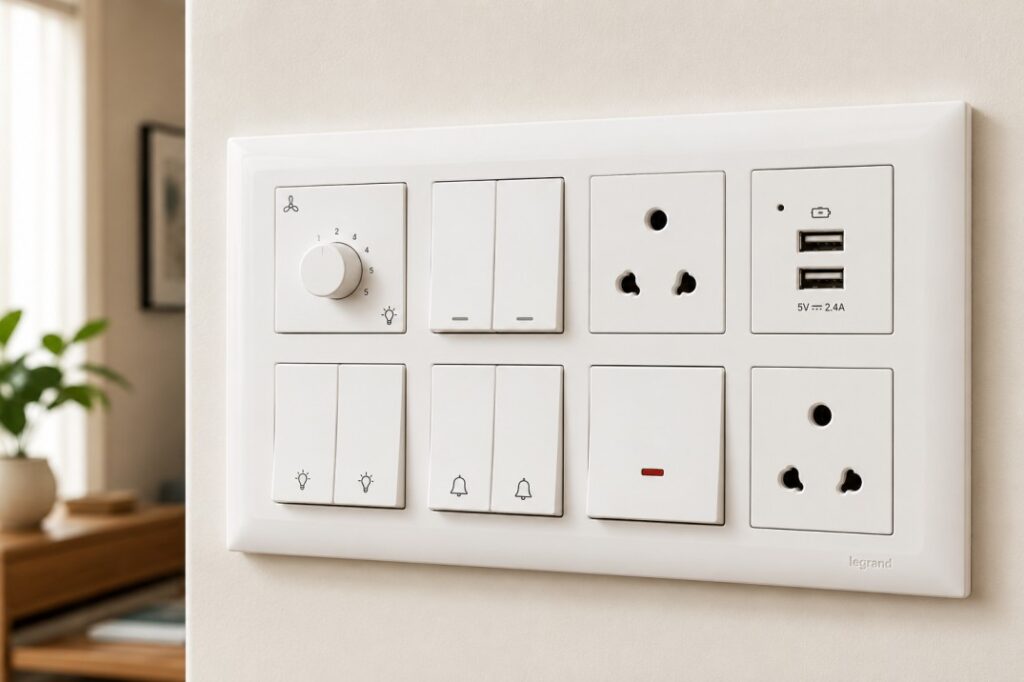
Step 3: Plan Your Switchboard and Distribution Board (DB) Location
Your Distribution Board — commonly called the DB box or main panel — is the heart of your home’s electrical system. All circuits in your home originate from this panel.
When you plan your DB location, keep these points in mind:
- Place the DB in a dry, ventilated, and easily accessible area — typically a utility corridor or near the main entrance
- Avoid locating the DB inside bedrooms or bathrooms
- For larger homes above 2,000 sq. ft., consider a sub-panel or secondary DB for the kitchen or top floor
- Always include MCBs (Miniature Circuit Breakers) for each circuit and an RCCB (Residual Current Circuit Breaker) for wet areas
Your switchboard locations in each room also need planning at this stage. Switch heights, positions relative to doors, and multi-gang arrangements should all be determined before the electrician begins conduit work.
Step 4: Plan Your Plug Point (Socket) Layout
This is where most homeowners underestimate their needs. During construction, adding an extra socket point costs very little. After plastering and painting, it costs significantly more.
As a general rule for each room type in an Indian home:
Living Room
- 4–6 sockets spread across walls (for TV, settop box, music system, lamps, phone charging)
- 1 socket near the entrance for a smart doorbell or panel
- Dedicated point for AC unit on an independent circuit
Bedroom
- 2 sockets on each side of the bed for phone charging and bedside lamps
- 1–2 sockets on the opposite wall for dressing table area and study desk
- Dedicated AC point and geyser point (for attached bathrooms)
Kitchen
- 6–8 sockets at countertop level for mixer, toaster, electric kettle, and more
- Separate dedicated sockets for refrigerator and microwave on independent circuits
- A socket below the sink for a water purifier
Home Office or Study
- 4–6 sockets for computer, laptop, printer, and monitors
- Ethernet cable point near the workstation for a stable internet connection
Planning these in advance ensures your furniture layout works perfectly with your socket placement — and you do not end up hiding sockets behind heavy wardrobes.
Step 5: Plan for Lighting — Ambient, Task, and Accent
Good lighting design is not just about fitting a light in every room. It involves layering different types of light to make your space functional and beautiful.
Before construction begins, plan for three types of lighting in every room:
- Ambient lighting — General ceiling lights or recessed downlights that illuminate the full room
- Task lighting — Focused lighting above work areas such as kitchen counters, study desks, and dressing mirrors
- Accent lighting — Decorative lights such as cove lighting, LED strips, and wall sconces that add depth and character to the space
Each type of light may require a separate circuit or at least a separate switch. Planning this at the wiring stage allows your electrician to run the correct conduits before the false ceiling or flooring goes in.
Step 6: Future-Proof Your Electrical Layout
India’s energy and technology landscape is evolving rapidly. Smart homes, solar rooftop systems, and electric vehicles are increasingly becoming mainstream. Therefore, it makes sense to plan for these from the start.
Here are future-proofing provisions you should include in your electrical layout for a new house in India:
- EV charging point provision in your parking area or garage with a dedicated 32A socket
- Solar panel inverter and battery connection point near your DB with space for a solar sub-panel
- Cat6 ethernet cabling throughout the home for high-speed internet at every point
- Smart home conduit for a future automation hub near your DB or entrance area
- Provision for home theatre wiring (conduit from TV wall to equipment rack location)
Adding these provisions during construction costs very little. Retrofitting them later is expensive and disruptive.
Step 7: Coordinate With Your Interior Designer and Architect
Electrical planning should never happen in isolation. Your interior designer, architect, and electrical consultant must work together from the early design stage.
At Maksideo Design Consultants, we integrate electrical coordination into the design process from day one. This means:
- False ceiling heights are planned around concealed lighting points and conduits
- Furniture layouts are aligned with socket and switch positions
- Feature walls are designed keeping power and data points in mind
- Kitchen design accounts for appliance locations and dedicated circuit requirements
This integrated approach ensures your home looks exactly as designed — with no exposed wires, misplaced switches, or sockets hidden behind furniture.

Common Electrical Planning Mistakes to Avoid
Even experienced homeowners sometimes make these mistakes when planning their home’s electrical layout:
- Not accounting for enough socket points — Always plan for 20–30% more sockets than you think you need
- Placing switches behind doors or in inconvenient locations — Always mark switch positions on the floor plan before finalising
- Ignoring earthing requirements — Proper earthing is essential for safety, especially in Indian monsoon conditions
- Skipping load calculations — Your total connected load determines the sanctioned load from your electricity provider; always calculate this in advance
- Not planning for external lighting — Balconies, gardens, building entrance, and parking areas all need dedicated outdoor circuit planning
Final Thoughts
Your home’s electrical layout is the invisible framework that makes daily life comfortable, safe, and convenient. When you plan it carefully before construction begins, you save money, avoid disruptions, and ensure your home is ready for the future.
At Maksideo Design Consultants, we bring together interior design expertise and construction coordination to help you make the right decisions at every stage of your home-building journey. Whether you are building a 2BHK apartment in Thane or a large villa in Navi Mumbai, thoughtful electrical planning is one investment that always pays off.
Ready to plan your dream home right from the foundation? Get in touch with our team today.